Blog
How to Use an Intraoral Scanner – A Step-by-Step Guide

Intraoral scanners have revolutionized the field of dentistry, making the process of capturing digital impressions quicker, more comfortable for patients, and more accurate. If you’re a dental professional considering incorporating this technology into your practice, this guide will walk you through the steps of using an intraoral scanner effectively.
What is an Intraoral Scanner?
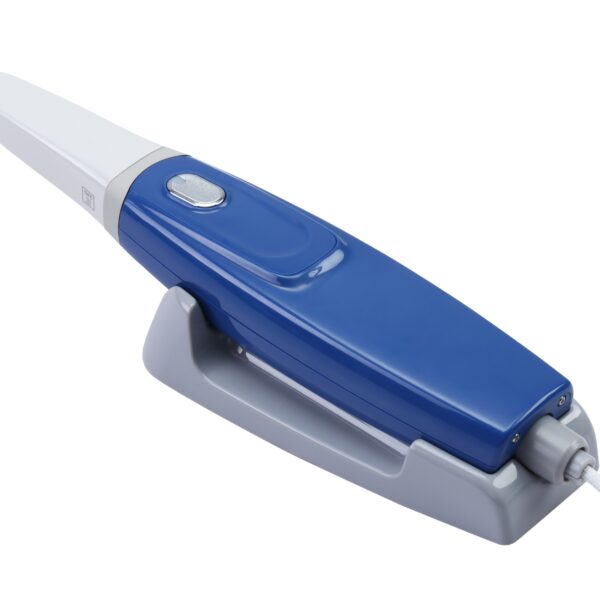
An intraoral scanner is a handheld device that uses optical scanning technology to capture direct 3D images of a patient’s oral cavity – including teeth, gingiva, and other hard and soft tissues. These digital impressions can then be used for various purposes, such as designing crowns, bridges, implants, orthodontic aligners, and more.
Before You Begin
Prior to starting the scanning process, there are a few important steps to take:
Patient Preparation
Ensure the patient’s mouth is clean and dry. Any saliva, blood, or debris can interfere with the scanning process.
Use cheek retractors and tongue depressors to provide a clear view of the scanning area.
Equpment Setup
Follow the manufacturer’s instructions to properly set up and calibrate the intraoral scanner.
Have all necessary supplies ready, such as scanner tips, disinfecting wipes, and protective coverings.
The Scanning Process
With your patient and equipment prepared, you can begin the scanning process:
Step 1: Attach the Scanner Tip
Start by attaching a new, sterilized scanner tip to the handpiece. These tips are single-use to prevent cross-contamination.
Step 2: Activate the Scanner
Turn on the intraoral scanner and allow it to warm up, if required. Consult the user manual for specific instructions.
Step 3: Prepare the Scanning Software
Open the scanning software on your computer and create a new case file for the patient. Enter any relevant information, such as the patient’s name and the type of restoration needed.
Step 4: Begin Scanning
Gently insert the scanner tip into the patient’s mouth, being careful not to touch soft tissues. Start by capturing images of the occlusal surfaces of the teeth, slowly moving the scanner over each surface.
Step 5: Scan the Buccal Surfaces
Rotate the scanner to capture images of the buccal (cheek-side) surfaces of the teeth. Maintain a consistent distance of about 5-10 mm between the scanner tip and the tooth surfaces.
Step 6: Scan the Lingual Surfaces
Repeat the process for the lingual (tongue-side) surfaces of the teeth, angling the scanner as needed for a clear view.
Step 7: Capture Interproximal Areas
Position the scanner to capture images of the interproximal (between-teeth) areas, including any preparations or areas of interest.
Step 8: Review and Refine
As you scan, the software will generate a 3D model in real-time. Review this model carefully, and rescan any areas that appear incomplete or inaccurate.
Step 9: Finalize and Export
Once you’re satisfied with the digital impression, finalize the case file and export the data in the appropriate format for your intended use (e.g., CAD/CAM software, lab prescription, etc.).
Post-Scanning Steps
After completing the scanning process, don’t forget these important post-scanning steps:
- Disinfect the Scanner
Follow the manufacturer’s guidelines for properly disinfecting the scanner handpiece and any reusable components.
- Sterilize the Scanner Tip
The intraoral scanner tip is autoclavable for sterilization between patients. It has a rated lifespan to withstand up to 100 autoclave cycles before needing replacement.
- Back Up Data
Be sure to back up the digital impression data securely, whether on an external hard drive or cloud-based storage solution.
Dental Lab Shop’s Premium Intraoral Scanner
Powered by advanced optics and intelligent software algorithms, this scanner captures intricate details for highly precise 3D dental impressions, ensuring exceptional trueness to intraoral conditions.
Its compact, ergonomic design and intuitive operation enhance workflow efficiency. With industry-leading capture speeds and seamless integration, Dental Lab Shop’s premium intraoral scanner sets new benchmarks in digital dentistry, empowering your practice with the ultimate scanning solution.
With practice and experience, using an intraoral scanner will become second nature, allowing you to provide your patients with high-quality restorations and a comfortable, efficient experience. Don’t hesitate to consult the manufacturer’s resources or seek additional training if you have any questions or concerns.

